Showing posts with label phase 2. Show all posts

May 28, 2013

The Bathroom Palette on a Budget

I love it. When the palette and components all pull together. It delights both the designer and the project manager in me. There's a lovely, satisfied release seeing it all lock together and take on its own life!               

Normally I have the core idea, and get the base pieces. Then I let each piece inform the surrounding pieces once it's in place. 

That habit comes from years of doing the rehab work myself. Being on the site every day gives you the opportunity to see pieces "in situ." That tells you a lot about the direction the rest must go. For example, I added a sandblasted art glass window to a dressing room, after I placed the built-in dressing table. I could just see how sandblasting the only window offered the needed privacy while letting natural light shine into the space. (And I got to design a unique window as well.) I like the feel of layering and growing the design theme in response to what's there.

Loni cutting the window resist
But my contractor Tim asked that I get everything chosen, bought, and delivered before he began any work. You know, essentially making all the design decisions at once. It makes sense of course, but it can be daunting.

If you're buying online as well as at local stores, purchasing several items at once gets you free shipping - no small chunk of change when items like tubs are involved. But that means you have to visualize how the vanity light fixture in brushed nickel will look with the tub doors that you've only seen as online "pictures". What's the scale of the design element? How does the polished "this" really look with the brushed "that"? Trust your sensibilities. Play! It does pull together and it is enjoyable to do. There's a total "Yes!" when it arrives, you lay it all out, and see how the materials and textures interplay.

In our new bath, the Designer me was inspired by one piece: the sandblasted Cavata tub doors by Kohler you see below. It created the whole textural palette that runs through the elements of the bath. 

Kohler Cavata sandblasted door
Once I found these doors with the light cross-hatched pattern, everything I added in some way incorporated that texture. Sandblasting expanded into frosted tile, and also became brushed nickel metallics. Then, as I found the next pieces, their shape, material or texture added additional conventions to the look. Now it was squared and frosted, brushed metal,etc. 

The challenge of course is to make it all hang together without looking like those women's jewelry sets of the 50's. You know, the identically matching earrings, necklace and bracelet numbers? So while all the metal is very square in feel, I'm mixing the polished chrome you see in the elegant tub spout in the top picture and bright square vanity hardware, with brushed nickel pieces to make the feel modern, more eclectic, and more visually engaging.

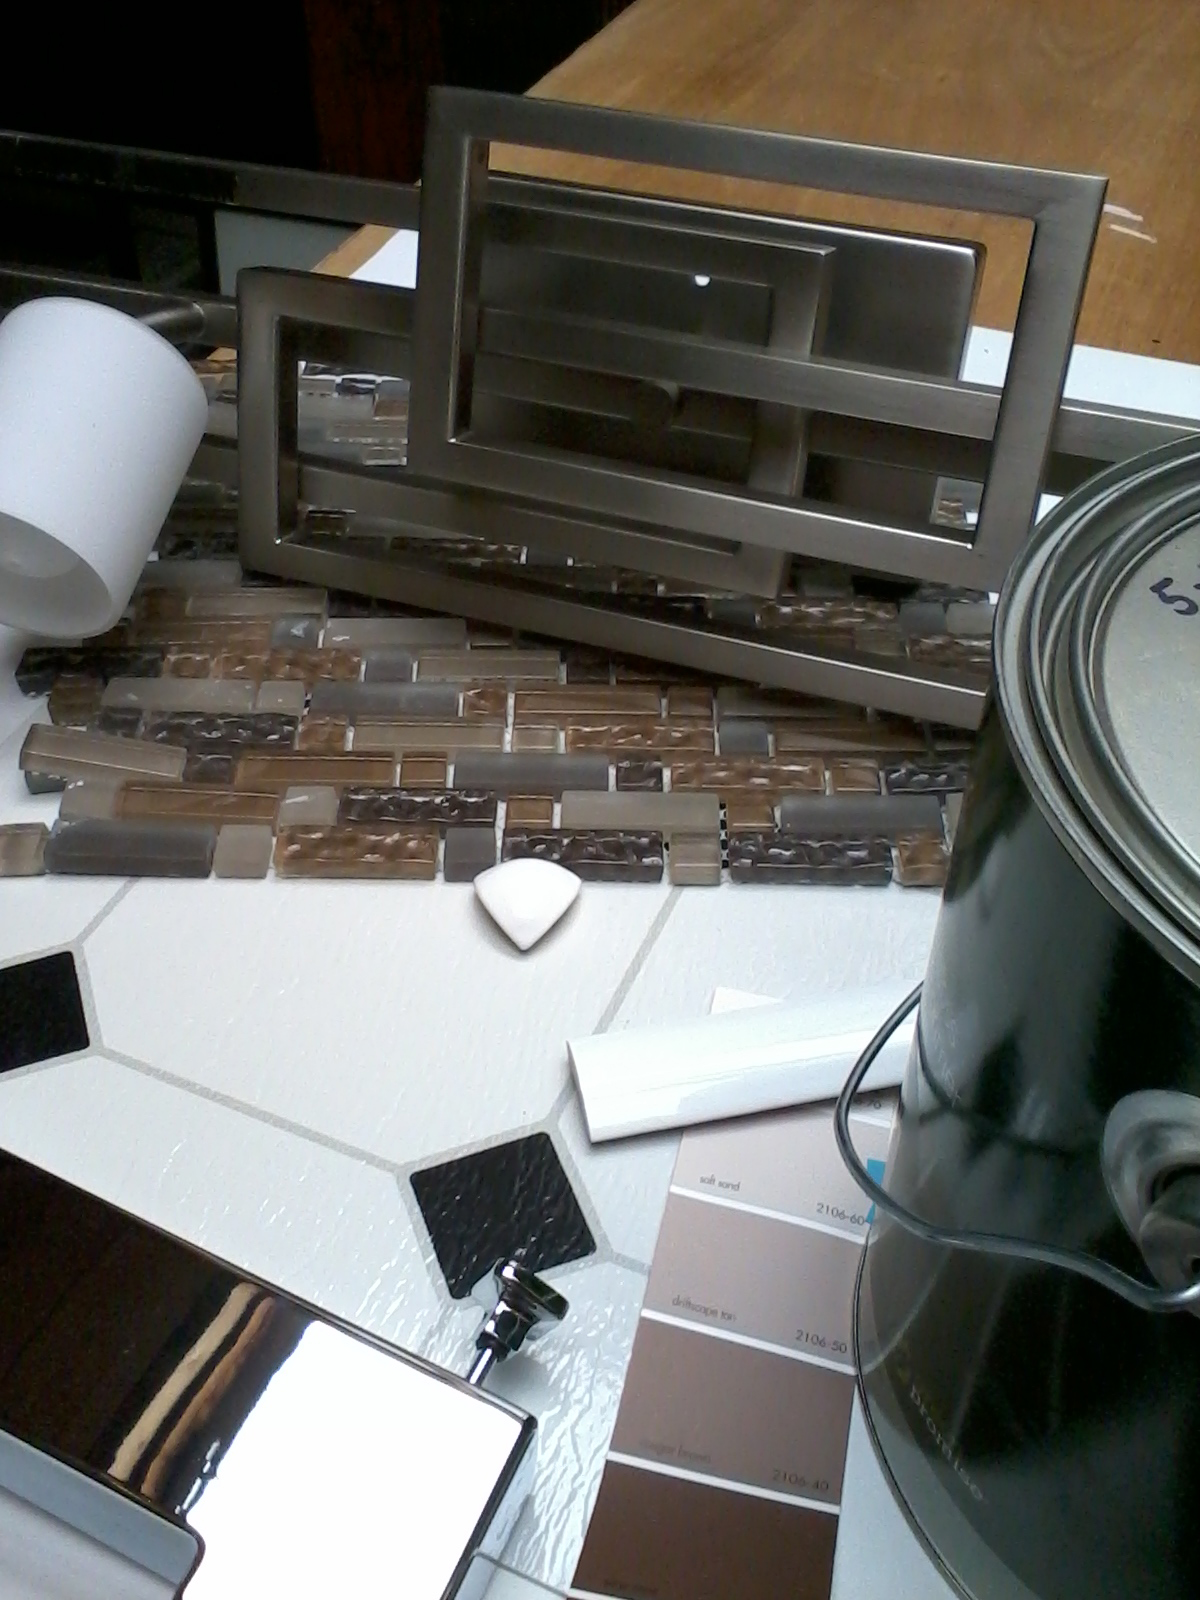
And yesterday, I bought the paint for the master bath, hallway and new alcove. (On sale, of course!) You can see the two colors I'm using in the bath tucked under the paint can, just below the white edge tile. That was a lovely, focused day carefully looking at tones, and undertones, grouping pieces to see their impact on each other. My goal was finding a palette that was subtle yet rich enough to catch some of the lively brown tile, but not too vintage that it would gray out the floor's white. See how the sandalwood tones just pull at the yummy "city lights" tile palette? And that mix really glows against the creamy white field tile. In a room without natural light....that's exactly what I need.

The brushed nickel multi-rectangular element is my vanity light fixture.Terrific yes? It has sandblasted lights that pick up the cross-hatched sandblasted pattern of my tub doors and the frosted  "city lights" tiles. So that finishes out everything needed for my Phase 2 redesign.

Remember that this design work was done on a slim, slim budget. Understanding that good design works deeply around one idea, you can let a single piece inspire and be your focus. Then as you judiciously buy what surrounds it, you can let go of other ideas (as I've mentioned in earlier posts here and here ) Concentrating that focus can be powerful. Or use good, budget-wise pieces to broaden the design conversation, as I did. Just make sure it's only one conversation!


May 23, 2013

PHASE 2: The Blue Cabinet

I am looking for my blue cabinet. Like this:

  
Weary, chipped,..... and so full of character.

I lived with this one for a vacation week in Mendocino last summer. As you see, the rest of the kitchen is modern, Danish clean, and obviously a choice owner Ron made to update what is essentially an1880's shanty.
Mendo's Garden Cottage


But this playful piece matches nothing else in the sleek creme and white kitchen. It just has to have a story around it. But I didn't want to ask Ron, in case it wasn't as provocative as my own musings about Mendo's past.


I know just where I want my cabinet to go in my kitchen. Here in that little recessed niche over the housemate fridge:


I love how the rich color says, "Look at me! Aren't I special?" More than that, in my kitchen it will say, "Loni lives here, and this gives you a hint about who she is." I see mine as green. Glass doors would be fun, but I'll take the character that I find and let it create its own story.

Since all my Phase 2 drawings are finally done and ready for Tim, I went shopping at Urban Ore, our local salvage recycling yard, or as they call it their Eco-Park.  No luck. But I'm still hoping to find other opportunities and places where I might find it. I could buy an inexpensive IKEA 30"x24" cabinet, distress, and antique it with my table milk paint. Won't have the period piece feel quite, so I'm holding out. It's an on-going hunt that I am enjoying between other tasks, and hopefully another weekend project that will have its own resonant feeling of putting myself into my house, as this Christmas table project did.


And I will write more about The Garden Cottage too. It's an example that can teach us how to use groups of buildings to achieve an amazing, and wonderfully intimate sense of "home." Ron has done many creative things to make the place unique and welcoming. It's an inspiring case study with many lessons.


May 4, 2013

A Date with My Demo Man

TJ is getting into this full bore.

We've got just over two weeks until our contractor starts, and TJ has taken it upon himself to organize and do the entire new master bath rip out. We are going down to studs in what was the old laundry room. 
Door that leads to kitchen.


Wall that will have tub.


April 27, 2013

The Stuff Behind the Staging

Being in the midst of remodeling feels a little like being a character in a performance. It feels like I'm playing a role, ...or pretending.

Pretending to be clean. Pretending to be organized. Pretending to strive for a more simple, aligned life and inviting others to share that with me. The common spaces of the house we share, and their own suites and storage areas have open spaces on the shelves, have little organized boxes for utensils, has all the herbal teas together on one shelf, and the Assam teas on another.

But my bedroom (where they cannot see) is like the prop shop of a theatre with its working disarray. Thermometers and band-aids, the boric acid eye wash, arm and knee supports, and ace bandages spill over their containers into piles of design magazines I still have to sort through. Extra vacuum bags are thrown on shelves that are already full of emergency earthquake food storage, with that box you grab as your most important papers.

My new studio has all the furniture in its right place, and my art and reference books are in the shelves, but placed haphazardly, so I cannot find what I need. For much of my storage, I have not yet made the decisions about what goes where, so they sit in bags on the floor in front of where they might live.

But this is what's in the place where the new shelves will go that will hold all that disorder:

 This is my new master bathroom: the deep soaking tub, my vanity and one wardrobe, the linen cabinet, and the flooring....plus some boxes of books that might actually get to stay here.


Here's my tub sliding doors, and the tile and grout for the tub and backsplash, the shower head, the vanity sink, another wardrobe, still to be assembled.... 
.....you get the picture.

It's hard to live with and in. But then I remember that during phase1, I lived with this for weeks to give the crew the space to work efficiently,...


so I can have this now:
I will look at this picture of my new wonderful studio and seating area, and remember that the fuss and clutter are so worth it. And when I finally get to use my deep soaker tub and master bath, that new wonderful transparent wall will have the space to hold my backless bookshelves that let light tease through.And when THAT happens, I will sort through my overspill...and simplify, at least to some degree, down to what I really want to keep. It will be real movement towards what's important to me.