
If you like plans and project pictures, read on:
I don't make assumptions. Contractors are very concrete, hands-on people. As a designer and a creative who also likes to project manage, I respond to that urge myself. It's fun to move it all around in my head, but making it happen is the truly satisfying part.
My husband was a precise, excellent General Contractor and we grew a good reputation in the cities around Seattle, Washington. We were willing to tackle the really decrepit, old houses. They knew that I loved the challenge of obsolete space flow. So when they needed to condemn a place they'd reclaimed, they called us. They trusted John and I to get the sorry house back on their tax rolls, enlivening their neighborhoods. They even referred to the house that John built for us as the "250 Year House." It was that well built. Still John never worked from formal plans. We worked from my sketches, and drawings, and this was way, way before CAD and Sketchup .
So the way I work with my contractor now is to give him plans for sure. But I also offer 3-dimensional views to make sure he is seeing what I'm seeing, and can get the whole picture that I have in my mind.
So for Phase 2 , I've created these pretty pictures: ( Click on anyone to get a slide show)
Of course I began with the whole house picture you saw when this project started. Now I add this simplified plan showing the area of the project, the demolition, new construction and the electrical work being done (In a project this small it can live in one drawing):

Then I've made these perspective drawings showing how I want the new kitchen alcove for mini-fridge and counter:

And these about the expanded pantry:


On the other side of the kitchen and pantry wall is where our new bathroom will be. In these pictures, I've made a wall transparent here and there, so he can see the bathroom and fixture layout. (Electrical is the yellow.)

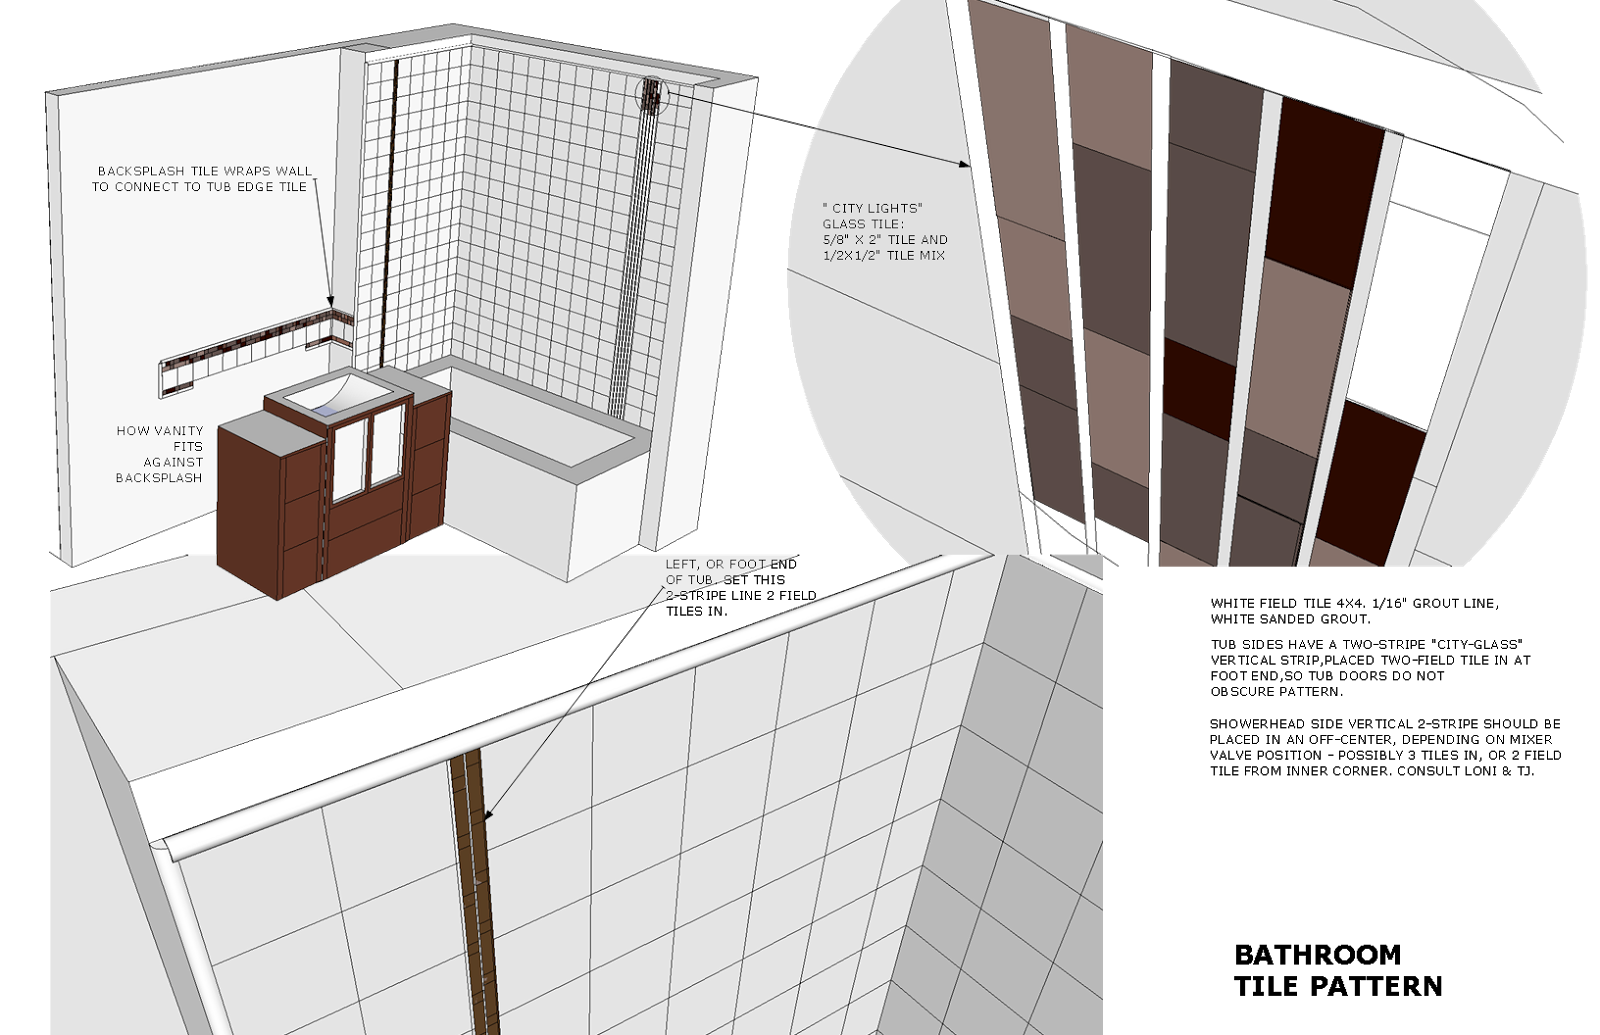
And then here are the tile designs for Tim, using that fabulous "city lights" tile mix I spoke about in an early post about pulling the design together. It lives in both the tub and around the vanity, wrapping the recessed wall and connecting the two elements. Also, notice that my tub has a vertical pattern, while my vanity backsplash uses the tile mix horizontally and plays with the two-level vanity.

Giving him all these perspective, noted drawings forced me to make better choices, because I had to think it all through and show him. Now I can let him work efficiently, without needing to grab me too often to answer "finish materials" or design questions.
Lastly, here's the alcove he'll be making from a sad corner that's always looked like this- even before we stuffed it with overflow to keep things out of the way for Phase 2:


Let's see how it turns out!
No comments:
Post a Comment